
How Saltwater Corrosion Affects Boat Hardware and How to Prevent It
Saltwater corrosion is one of the main reasons boat hardware starts to stain, pit, seize, loosen, or fail before it should. The issue is not limited to neglected boats. Even corrosion-resistant stainless steel can develop brown marks, tea staining, localized pitting, or fastener corrosion when salt, moisture, limited oxygen, surface contamination, and mixed metals are allowed to work together.
For boats used in saltwater, brackish water, coastal marinas, or humid storage environments, corrosion prevention is part of normal ownership. It is not realistic to say corrosion can be stopped completely, but a consistent routine of rinsing, inspection, cleaning, and timely replacement can reduce damage and help hardware remain reliable for longer.
Deck fittings live in a harsh place. Cleats handle mooring loads, hinges move under vibration, handrails are pulled and gripped repeatedly, deck fillers collect water and residue around caps, and fasteners often sit in holes where moisture can become trapped. Good corrosion control starts with understanding where the damage begins and what kind of corrosion you are looking at.
Why Saltwater Is So Aggressive
Saltwater is hard on boat hardware because it combines water, dissolved salts, oxygen, and chloride ions. Chlorides are especially important because they can disturb the thin protective surface layer that helps stainless steel resist corrosion. When that layer is contaminated, scratched, starved of oxygen, or exposed to concentrated salt deposits, staining and pitting can begin.
Salt remains active after the boat appears dry. When spray evaporates from a cleat base, hinge knuckle, handrail mount, deck filler cap, or fastener recess, salt crystals can remain behind. Those deposits attract moisture from the air, which keeps the surface damp and increases the time metal spends in a corrosive environment.
This is why boats kept in coastal marinas can show corrosion even when they are not used every week. Salt air, humidity, trapped spray, wet dock lines, and covered deck fittings can keep hardware exposed between outings. A fitting may look dry from above while salt and moisture remain under its base or around its fasteners.
The Role of Oxygen and Surface Contamination
Stainless steel relies on oxygen to maintain its corrosion-resistant passive surface. In open, clean, well-rinsed areas, the metal surface has a better chance of staying stable. Problems often begin where oxygen is limited, such as under washers, beneath fitting bases, inside screw holes, behind hinge leaves, or under dirt and salt deposits.
These oxygen-limited areas are common on boats because many fittings are mounted tightly to decks, consoles, hatches, rails, or transoms. When saltwater enters the joint and cannot rinse or dry easily, a small crevice can become more aggressive than the exposed surface around it.
Surface contamination adds another risk. Steel dust from tools, residue from unsuitable cleaners, carbon-steel brushes, or abrasive pads can leave particles on stainless hardware. Those particles may rust and create brown staining that looks like the stainless fitting itself is rusting. Clean handling, correct tools, and careful cleaning products matter as much as the material choice.
Stainless Steel Grade and Real Marine Exposure
Stainless steel is not one single material. Different grades and finishes behave differently in saltwater and coastal air. Where stainless grade information is available, marine and coastal installations are commonly better served by 316 stainless steel or a material with equivalent corrosion resistance. Lower-grade stainless, plated hardware, or general-purpose fittings may look suitable at first, but they are more likely to stain, pit, or deteriorate in saltwater exposure, especially in sheltered or poorly rinsed areas.
This does not mean 316 stainless is corrosion-proof. In areas where seawater becomes concentrated, oxygen is limited, or stagnant water sits against the metal, even corrosion-resistant stainless can suffer tea staining, pitting, or crevice corrosion. Material selection helps, but it does not replace good design, drainage, bedding, rinsing, and inspection.
Surface finish also matters. Smooth, clean surfaces collect less salt and dirt than rough, scratched, or poorly finished surfaces. Rough welds, damaged polishing, sharp recesses, and undersized fastener pockets can hold salt deposits and make cleaning less effective.
Rust, Tea Staining, Surface Staining, and Pitting
Not every brown mark means a fitting has failed, but every mark should be inspected. The useful question is whether the issue is surface contamination that can be cleaned, or whether corrosion has started to affect the metal, fasteners, or mounting area.
| Condition | Typical Appearance | Common Cause | Practical Response |
|---|---|---|---|
| Surface staining | Light brown marks, streaks, or discoloration on the exposed face | Salt residue, dirt, cleaner residue, or metal contamination | Clean with a suitable marine-safe product, rinse thoroughly, dry, and inspect again |
| Tea staining | Brown staining on stainless steel, often near edges, welds, fasteners, or sheltered areas | Salt, humidity, chlorides, surface contamination, and limited cleaning or airflow | Remove early, improve rinsing, and check nearby crevices and fasteners |
| Pitting | Small dark pinholes, rough spots, or localized surface damage | Localized breakdown of the corrosion-resistant surface, often where salt and moisture stay trapped | Inspect closely; replacement may be safer if pits are deep, spreading, or located on load-bearing hardware |
| Crevice corrosion | Corrosion emerging from under a fitting base, washer, fastener head, hinge leaf, or flange | Saltwater trapped in an oxygen-limited joint or bedding gap | Remove, inspect, clean, rebed, or replace the fitting depending on metal loss and deck condition |
| Heavy rust or material loss | Flaking corrosion, rough swelling, orange rust, damaged threads, or visible metal loss | Unsuitable metal, damaged plating, wrong fasteners, trapped moisture, or advanced corrosion | Replace the affected part and inspect the deck, fasteners, backing hardware, and sealant |
Tea staining is common on stainless steel in marine environments. It is often cosmetic at first, but it should not be ignored. It shows that salt or contamination is staying on the surface long enough to create visible discoloration. If the cause is not corrected, the same area may continue to stain after each cleaning.
Pitting deserves more caution. Unlike surface staining, pitting removes metal. On cleats, hinges, latches, handrail bases, or deck fittings, pitting near fasteners or load paths should be treated as a structural warning sign. A fitting can look acceptable from a distance while the area around a screw hole, hinge pin, or underside base is already weakened.
Why Unsuitable Hardware Fails Faster
Boat hardware has to tolerate salt spray, washdowns, UV exposure, vibration, impact, repeated handling, and load. A fitting intended for indoor or general-purpose use may look similar to marine hardware, but it may not survive the same conditions. Plated parts can corrode once the coating is scratched. Rough edges, poor weld finishing, weak pins, and unsuitable fasteners can all become early corrosion points.
Installation quality also affects service life. A cleat that rocks under mooring load, a hinge that binds, or a deck fitting mounted on an uneven surface can move slightly every time the boat vibrates or takes load. That movement can break bedding sealant, allow saltwater under the base, and leave fasteners sitting in damp holes.
When replacing exposed deck fittings, it is worth comparing parts within marine-focused categories such as Boat Hardware & Accessories. The replacement should suit the boat’s environment, mounting surface, fastener pattern, access below deck, and expected load. A part that fits the hole pattern but is not suitable for the exposure can create the same problem again.
Above-Deck Hardware and Stagnant Water Are Different
Most visible deck hardware is exposed to air, which helps stainless steel maintain its corrosion-resistant surface. The risk increases when water becomes trapped and oxygen cannot circulate. This is why stains often start from the edge of a fitting base, the underside of a washer, a screw recess, or a hinge knuckle rather than from the open face of the fitting.
Underwater hardware, raw-water fittings, shaft areas, and parts exposed to stagnant water are a different category and need more specialized material selection. Stainless steel that performs acceptably on an open deck may be a poor choice in a submerged or oxygen-starved location. If corrosion appears near underwater hardware, through-hull areas, shafts, strainers, or bonded systems, it should be assessed by a qualified marine professional.
For deck hardware, the practical goal is to keep saltwater from sitting under the fitting. Correct bedding, clean fastener pockets, good drainage, and regular inspection help prevent the hidden stagnant-water conditions that allow corrosion to start.
Mixed Metals and Galvanic Corrosion
Saltwater can also create galvanic corrosion when dissimilar metals are electrically connected. This can happen when stainless fasteners are installed into aluminum, when a fitting contacts a different metal without isolation, or when replacement hardware does not match the surrounding structure.
The risk depends on the metals involved, how wet the area stays, whether the metals are in direct contact, and the size relationship between the metal surfaces. Early signs can include white powdery corrosion on aluminum, brown staining around fasteners, bubbling coatings, looseness, or corrosion that keeps returning from the same joint.
Mixed-metal installations should be handled deliberately. Use compatible fasteners, isolate dissimilar metals where appropriate, keep the joint clean, and prevent standing saltwater around the connection. If corrosion appears near bonded hardware, through-deck fittings, electrical systems, or structural metal, a qualified marine technician should inspect the installation.
Where Corrosion Usually Starts
Corrosion often starts where inspection is difficult. The visible top of a fitting may look clean while the underside, screw holes, bedding area, backing plate, washers, or nuts are damp and stained. For that reason, deck hardware should be inspected as a complete installation, not only as a polished surface.
— Around fastener heads, where salt crystals and grime collect in recesses.
— Under washers, screw heads, and fitting bases, where moisture can stay trapped.
— At cleat bases, especially where mooring loads have caused movement or sealant failure.
— Around hinge pins and knuckles, where salt dries inside narrow moving gaps.
— Beneath handrail bases, where repeated pulling loads can open small bedding gaps.
— Around deck filler caps, where water, salt, fuel residue, and cleaning residue may collect.
— Inside unsealed screw holes, especially where the deck core was not sealed before fastening.
For load-bearing hardware such as stainless steel boat cleats, inspection should include the fasteners, backing plates, deck laminate or core condition, and any sign of movement. A shiny cleat is not enough if the underside hardware is corroded, the bedding has failed, or the deck is soft around the base.
Why Freshwater Rinsing Helps
Freshwater rinsing helps because it removes salt before it dries and concentrates on the surface. After a saltwater outing, rinsing deck hardware, rails, hinges, cleats, ladders, rod holders, deck fillers, and exposed fasteners reduces chloride buildup and removes loose grit.
The rinse should reach the areas where salt actually collects. Pay attention to fastener heads, hinge gaps, latch pockets, cleat bases, underside edges, and horizontal surfaces where saltwater dries. A quick splash across the deck is not the same as a careful rinse around hardware.
Use low to moderate pressure around sealed fittings. Very high pressure can push water into weak bedding or existing gaps. After rinsing, airflow matters. Hardware covered by wet lines, canvas, cushions, fenders, or stored gear may stay damp long after the rest of the boat appears dry.
Basic Cleaning and Maintenance Routine
A good corrosion routine should be consistent, realistic, and easy to repeat. For saltwater boats, the most practical routine combines freshwater rinsing, mild washing, careful stain removal, and scheduled inspection of fittings, fasteners, sealant, and backing hardware.
— Rinse exposed hardware with freshwater after saltwater use, including fastener recesses and tight gaps.
— Wash periodically with mild boat-safe soap to remove salt film, dirt, sunscreen residue, fish blood, and grime.
— Use a suitable stainless cleaner only when needed, follow the product instructions, and test carefully on a small area first.
— Avoid bleach, chloride-heavy cleaners, steel wool, carbon-steel brushes, harsh acids, and aggressive abrasives unless the hardware or cleaner manufacturer specifically approves the method.
— Rinse cleaning products thoroughly so residue does not remain around fasteners, hinge pins, deck seams, cap threads, or other crevices.
— Dry exposed stainless where practical, especially after cleaning or when water tends to sit in recesses.
— Inspect bedding sealant around fittings for cracks, lifting edges, dark staining, or water weeping from the base.
— Check moving hardware for stiffness, binding, looseness, corrosion around pins, or rough movement under load.
— Track recurring stains or loose fasteners because repeated symptoms often point to trapped moisture, failed bedding, or installation movement.
Saltwater Corrosion Prevention Checklist
Use this checklist after saltwater outings, during seasonal maintenance, and before longer trips or periods of heavier use.
| Check Area | What to Look For | Recommended Action |
|---|---|---|
| Freshwater rinse | Salt film, dried spray, white crystals, sticky residue | Rinse thoroughly after saltwater use and allow hardware to dry |
| Fasteners | Brown rings, salt in recesses, loose screws, damaged heads | Clean and inspect; investigate repeated staining, movement, or damaged heads |
| Sealant and bedding | Cracks, gaps, lifted edges, water weeping from fitting bases | Rebed the fitting if water intrusion or failed sealant is suspected |
| Moving parts | Stiff hinges, rough movement, seized pins, staining at pivots | Clean carefully and replace if wear, pitting, or seizure affects function |
| Load-bearing fittings | Movement, deck flex, pitting, elongated holes, soft deck areas | Remove from service until inspected if strength or deck condition is questionable |
| Mixed-metal joints | White aluminum corrosion, bubbling coating, staining at contact points | Check material compatibility, isolation, sealing, and fastener selection |
| Underside access | Rusty nuts, damp backing plates, dark stains, loose washers | Inspect below deck where possible and address leaks before hardware loosens |
| Deck core risk | Soft deck areas, weeping holes, old sealant, dark moisture staining | Investigate before reinstalling hardware; sealing the top surface alone may not be enough |
Common Mistakes That Make Corrosion Worse
| Mistake | Why It Causes Problems | Better Practice |
|---|---|---|
| Skipping the freshwater rinse | Salt dries on the hardware and keeps attracting moisture from the air | Rinse exposed fittings after saltwater use, especially around fasteners and crevices |
| Using household metal cleaners without checking suitability | Some cleaners can damage finishes, stain surfaces, or leave residue in gaps | Use boat-appropriate cleaners and follow instructions carefully |
| Scrubbing stainless with steel wool | Iron particles can embed in the surface and create rust-colored staining | Use non-contaminating cloths or pads intended for stainless care |
| Installing fittings without sealing drilled holes | Water can enter the deck core or remain trapped around fasteners | Seal holes properly and check hidden wiring, fuel lines, tanks, plumbing, and structure before drilling |
| Ignoring slight movement | Movement can break bedding, enlarge holes, and allow saltwater under the fitting | Tighten, rebed, reinforce, or replace before the fitting damages the deck |
| Mixing metals without isolation | Saltwater can act as an electrolyte and accelerate galvanic corrosion | Use compatible materials and isolate dissimilar metals where appropriate |
| Replacing only the visible part | The old fasteners, backing area, or wet deck core may still be the source of the problem | Inspect the complete installation, including underside access and mounting surface condition |
When Cleaning Is Enough
Cleaning is usually enough when staining is light, surface-level, and does not return quickly after proper rinsing and drying. A hinge with mild tea staining on the exposed face may only need careful cleaning, better rinsing, and closer monitoring. A cleat with light staining but no pitting, movement, loose fasteners, or deck damage may remain serviceable after cleaning.
The key is to inspect after cleaning. If the stain disappears and the metal underneath is smooth, the fitting may only have had salt residue or surface contamination. If the stain returns from the same fastener hole, base edge, hinge gap, or cap thread, there may be trapped moisture or contamination that cleaning cannot reach from above.
Cleaning should not be used to hide a structural issue. If the fitting moves, the fasteners are damaged, the deck is soft, or the metal surface has pitting in a load path, the problem needs more than polishing.
When Replacement Is Safer
Replacement is safer when corrosion affects strength, movement, sealing, or function. Deep pitting, cracks, seized hinge pins, loose bases, elongated fastener holes, heavy rust, damaged threads, or corrosion under load-bearing hardware should not be treated as cosmetic damage.
Before replacing deck-mounted hardware, measure the footprint, fastener spacing, hole diameter, deck thickness, access below the fitting, and backing arrangement. Check for hidden wiring, fuel lines, tanks, plumbing, and structural members before drilling or cutting. If the fitting handles mooring loads, boarding loads, anchoring loads, or handhold loads, use suitable fasteners and backing plates.
If deck strength is uncertain, if the old fitting has been moving, or if there is moisture in the core, professional inspection is the safer route. A new fitting installed over a damaged mounting area may fail earlier than expected even if the replacement part itself is suitable.
Real-World Examples on Saltwater Boats
A marina-kept center console may develop brown rings around cleat fasteners even when the deck is washed occasionally. The visible stain may clean off, but the repeated pattern can point to salt trapped in screw recesses or moisture beneath the cleat base. The owner should check for cleat movement, old bedding sealant, wet backing hardware, and deck softness around the installation.
A cabin boat with exposed deck fillers may show staining near the cap threads because water, salt, fuel residue, and dirt collect in the recess. In that case, cleaning the metal is only part of the job. The cap seal, surrounding deck surface, drainage path, and bedding condition should also be checked.
A folding hatch hinge can begin to bind after a season in saltwater because salt dries inside the hinge knuckle. If cleaning restores smooth movement and there is no pitting or looseness, the hinge may remain usable. If the pin area is badly pitted, seized, cracked, or loose, replacement is better than forcing the hinge until it fails.
An aluminum-framed console or rail with stainless fasteners may show white corrosion around the fastener heads. That pattern can point to a mixed-metal issue, especially if the area stays wet or salty. Cleaning the stain may improve appearance, but the installation should also be checked for isolation, bedding, and fastener compatibility.
Inspection Schedule for Saltwater Boats
Inspection frequency depends on how often the boat is used, how it is stored, and how exposed the hardware is to spray and salty air. A boat used weekly in saltwater needs more attention than a freshwater boat stored indoors. A boat sitting in a coastal marina may still need rinsing and inspection even if it has not left the berth recently.
— After each saltwater outing, rinse exposed hardware and look for obvious staining, looseness, trapped salt, or damaged sealant.
— Monthly during the season, inspect fasteners, cleat bases, hinges, handrails, deck fillers, ladders, and other exposed fittings.
— Before heavy weather, long trips, or higher-load use, check load-bearing fittings and backing access where possible.
— At seasonal haul-out or lay-up, clean hardware thoroughly, inspect underside fasteners, and identify fittings that need rebedding or replacement.
Buying and Replacement Tips
When choosing replacement hardware, match the part to the actual job, not only to the visible size of the old fitting. Consider the exposure level, load, mounting surface, fastener spacing, access below deck, and whether the part sits in a wet or sheltered area. Hardware installed in a cockpit, swim platform, foredeck, or marina-exposed rail area usually needs more corrosion attention than hardware inside a dry cabin.
For moving parts such as hinges, check pin condition, leaf thickness, mounting pattern, swing clearance, and whether the hinge will trap water in its installed position. For handholds and rails, check grip position, base contact area, fastener access, and backing support. For deck fillers, check cap sealing, thread condition, drainage around the recess, and compatibility with the intended deck opening.
Hardware should sit flat without rocking. Fasteners should tighten securely without crushing the deck surface. Sealant should bed the fitting without blocking drainage paths that need to remain open. If a part is load-bearing or safety-critical, the installation should be treated as a structural job, not a cosmetic replacement.
FAQ
Why does stainless steel rust on a boat?
Stainless steel is corrosion-resistant, not corrosion-proof. Salt deposits, chlorides, low oxygen in crevices, surface contamination, and poor cleaning can cause rust-colored staining or pitting, especially around fasteners and sheltered areas.
What is tea staining on stainless steel?
Tea staining is brown discoloration that appears on stainless steel in marine or coastal environments. It is often caused by salt, humidity, chlorides, and surface contamination. It should be cleaned early and monitored because it shows that corrosive deposits are staying on the surface.
Is 316 stainless steel enough for saltwater?
316 stainless steel is commonly used for marine and coastal hardware because it offers better resistance than lower-grade stainless in chloride exposure. It is still not corrosion-proof. Poor drainage, stagnant water, trapped salt, surface contamination, or oxygen-limited crevices can still cause staining or pitting.
How often should I rinse boat hardware after saltwater use?
Rinse exposed hardware after every saltwater outing when practical. Focus on fastener heads, hinge gaps, cleat bases, rails, deck fittings, and horizontal surfaces where saltwater dries. Boats stored in salty air may also need periodic rinsing between uses.
Can mixed metals damage marine hardware?
Yes. Dissimilar metals in electrical contact can develop galvanic corrosion when saltwater is present. This is common around stainless fasteners in aluminum parts or mixed-metal deck installations. Use compatible materials, isolate metals where appropriate, and inspect these joints regularly.
When should corroded hardware be replaced?
Replace hardware when corrosion affects strength, sealing, movement, or safety. Deep pitting, cracks, seized moving parts, loose bases, elongated fastener holes, heavy rust, or damage on load-bearing fittings are warning signs that cleaning may no longer be enough.
Related Nove Sea Categories
— Hinges
Related products
-

SLT 9" Stainless Steel Grab Handle
Price: $71.00This SLT 9" grab handle is built for reliability in marine and outdoor... -

SLT 12" Stainless Steel Grab Handle
Price: $82.00A sturdy and polished grab handle designed for enhanced safety and style on... -

SLT 8" 316 Stainless Steel Grab Handle
Price: $70.00Designed for strength and reliability, the SLT Grab Handle provides a secure... -

HMI Polished 9" 316 Stainless Steel Boat Grab Handle
Price: $48.00Upgrade your boat’s safety and appearance with this 9" grab handle, crafted... -

HMI Polished 9" 316 Stainless Steel Boat Grab Handle
Price: $42.00This polished 9" (229 mm) boat grab handle is made from high-quality 316... -

HMI 2 Pieces Polished 316 Stainless Steel 12" Boat Grab Handles
Old price: $108.00 Price: $97.20 Discount: 10% Save up: -$10.80Upgrade your boat’s safety and aesthetics with this premium-grade grab handle... -

HMI 2 Pieces 12" Polished 316 Stainless Steel Boat Grab Handles
Old price: $92.00 Price: $82.80 Discount: 10% Save up: -$9.20Enhance onboard safety and grip comfort with this sleek, heavy-duty,... -

HMI 2 Pieces 316 Stainless Steel Polished Boat Grab Handles
Price: $99.00This set of two grab handles is made from polished 316 stainless steel,... -

HMI 2 Pieces 16" 316 Stainless Steel Boat Grab Handles
Old price: $98.00 Price: $88.20 Discount: 10% Save up: -$9.80Enhance your deck’s safety and style with this pair of 16" grab handles... -
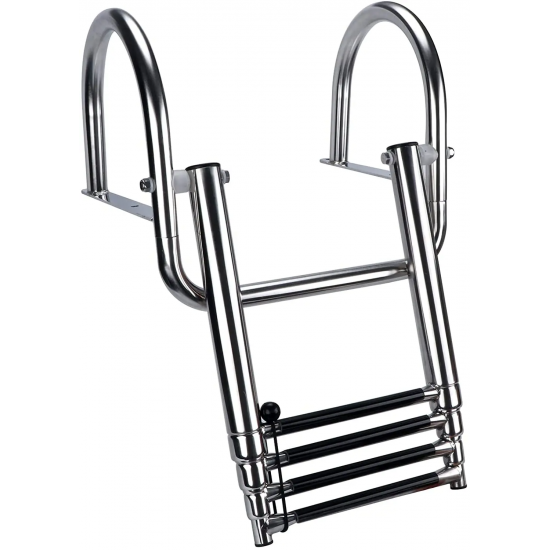
HMI 316 Stainless Steel Telescoping Boat Ladder with Handrail
Old price: $304.00 Price: $273.60 Discount: 10% Save up: -$30.40Step aboard with confidence using this premium-grade telescoping ladder,... -

HMI 2 Pieces 16" 316 Stainless Steel Boat Grab Handles
Price: $99.00This set includes two marine-grade grab handles crafted from durable 316... -
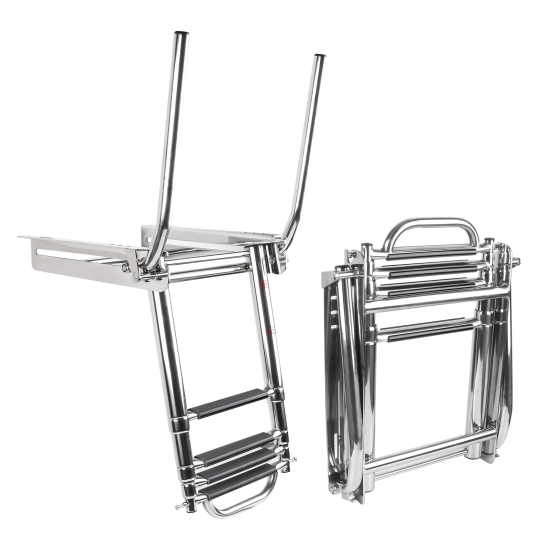
HMI 316 Stainless Steel Under-Platform Telescoping Boat Ladder with Handrails
Old price: $414.00 Price: $372.60 Discount: 10% Save up: -$41.40Step aboard with confidence using this premium-grade telescoping boat ladder,...