
Common Boat Hardware Replacement Mistakes and How to Avoid Them
Replacing boat hardware can look simple until the new fitting does not line up, the old screws come out corroded, or water starts finding its way into the deck. Cleats, hinges, grab handles, rod holders, deck fillers, ladders, and similar fittings may be small compared with engines or electronics, but many carry load, seal deck openings, or protect access points.
Most replacement problems begin before installation. A boat owner buys from a photo, assumes the hole spacing is close enough, reuses old or damaged fasteners, skips bedding sealant, or treats a load-bearing fitting like trim. A better replacement starts with measuring, checking the mounting surface, matching the material to the environment, and thinking through how the hardware will actually be used.
Why Boat Hardware Replacement Needs Care
Boat hardware is exposed to moisture, vibration, UV, movement, and corrosion risk in ways that household fittings are not. A locker hinge may see constant vibration. A cleat can take shock loads from mooring lines. A grab handle may support someone moving across a wet deck. A ladder bracket may carry repeated boarding loads, and a rod holder can see leverage from trolling or a sudden strike.
That is why replacement hardware should not be chosen only by appearance. The new fitting must suit the mounting surface, the old hole pattern where possible, the load it may carry, and the environment where it will live. If you are comparing general boat hardware and accessories, start with function, fitment, and installation requirements before finish.
Choosing the Wrong Material
The correct material depends on exposure and use. Hardware inside a dry cabin does not face the same conditions as a cleat on a saltwater deck or a ladder fitting near a swim platform. Stainless steel, aluminum, plastic, and plated parts can all have suitable uses, but they are not interchangeable.
Stainless steel is corrosion-resistant, not corrosion-proof. Salt deposits, chlorides, trapped moisture, poor drainage, surface contamination, mixed metals, oxygen-limited crevices, and lack of maintenance can still cause tea staining, pitting, or crevice corrosion. Hardware used in coastal air or saltwater needs more careful material selection than a protected freshwater fitting.
Be cautious with vague descriptions such as “marine style,” “stainless finish,” or “rust resistant” without clear material information. For exposed or load-bearing hardware, unclear material should be treated as a warning sign.
Checking Fit Before You Order
One common replacement mistake is buying from a photo without checking fit. A cleat, hinge, handle, rod holder, ladder fitting, or deck filler may look similar while using a different base footprint, hole spacing, screw size, height, angle, or cutout requirement.
Measure before ordering. Check overall length and width, mounting hole center-to-center spacing, fastener diameter, base shape, clearance around nearby hardware, and any through-deck or cutout dimensions. For hinges, also check leaf width, pin position, opening direction, and how the hatch or lid sits when closed. For deck fillers, check cap size, thread style, hose access, and sealing surface.
If the replacement does not match the old holes, do not force it into place. Enlarging holes or drilling new ones may be acceptable in some situations, but only after checking the underside, deck core, wiring, fuel lines, tanks, plumbing, and structural elements.
Reusing Weak or Mismatched Fasteners
Old screws and bolts are often part of the problem. They may be corroded, worn, undersized, mismatched, contaminated, or damaged during removal. Reusing weak fasteners can make a new fitting unreliable from the start.
Fastener material, size, head style, thread type, and length should suit the hardware, deck surface, and environment. Be careful with mixed metals, especially where stainless hardware is installed on aluminum in wet or salty conditions. Dissimilar metals in the presence of saltwater can increase galvanic corrosion risk.
For load-bearing hardware, fasteners should not be selected only because they fit the hole. Check whether the installation needs washers, backing plates, isolation, or reinforcement. If the original fasteners were loose, corroded, or surrounded by damaged material, inspect and repair the mounting area before installing the replacement.
Skipping Sealant and Bedding
Deck hardware usually needs bedding, not just tightening. Sealant helps reduce water intrusion around fasteners and mounting bases. This is especially important on fiberglass and cored decks, where water entering through old screw holes can damage the core over time.
Use a marine-grade sealant suitable for the materials and service area. Do not assume every adhesive sealant is correct for every fitting. Some hardware may need to be removable later, while other installations may require stronger bonding. Follow the sealant manufacturer’s guidance for surface preparation, cure time, and compatibility.
Sealant is not a substitute for poor fit or weak backing. If a fitting rocks, bridges over a curved surface, or clamps unevenly, sealant alone will not make the installation reliable. The base should sit properly, fasteners should tighten evenly, old holes should be sealed correctly, and tightening should not squeeze out so much bedding that the sealant path is defeated.
Ignoring Load and Backing Support
Some hardware carries more load than it appears to. A grab handle may be used during a slip. A boarding ladder fitting may see leverage every time someone climbs from the water. A rod holder may be pulled sideways under fishing load. A cleat may see shock loads when wind or wake moves the boat against a mooring line.
When replacing boat cleats, ladders, grab handles, or rod holders, inspect what supports the fasteners underneath. Washers may be enough for some light-duty installations, but many load-bearing fittings need backing plates or reinforcement to spread load across a larger area. Thin fiberglass, wet core, cracked gelcoat, old plywood, and unsupported panels should not be ignored.
If the underside cannot be inspected, if the deck feels soft, or if the hardware supports people, mooring loads, boarding loads, or heavy equipment, professional inspection is the safer choice. Structural hardware should not be treated as decorative hardware.
Over-Tightening Hardware
Over-tightening can damage the surface you are trying to protect. Screws can strip, gelcoat can crack, bedding sealant can be squeezed out, and cored decks can be compressed. A fitting that looks tight at first may later leak or loosen because the mounting surface or sealant path has been damaged.
Tighten hardware evenly and gradually. Watch how the base sits against the deck. If one side pulls down more than the other, the surface may be uneven, the holes may be misaligned, or the part may not match the deck shape. Do not use fastener torque to force a poor fit.
Not Checking Surface Compatibility
Fiberglass, aluminum, wood, and composite surfaces behave differently. Fiberglass can crack around holes if unsupported or over-tightened. Aluminum requires attention to dissimilar-metal contact and bedding. Wood can compress, split, or hold moisture. Composite and cored structures need careful sealing around penetrations.
The same hardware may need different fasteners, washers, backing, isolation, or sealant depending on the surface. Before installation, clean the area, remove old sealant, inspect for cracks or soft spots, and confirm that the surface can support the new fitting. If the old hardware failed because the mounting surface was damaged, simply installing a new part will not solve the underlying issue.
Mistake, Consequence, and Solution Table
Use this table as a practical check before drilling, sealing, or tightening replacement hardware.
| Mistake | Possible Consequence | Better Solution |
|---|---|---|
| Buying by photo only | Wrong size, wrong footprint, or poor fit on the deck. | Measure hole spacing, base size, cutout, clearance, and fastener requirements. |
| Ignoring material and exposure | Early staining, corrosion, or unsuitable performance in wet or saltwater areas. | Match material to exposure, drainage, and maintenance conditions. |
| Reusing old fasteners | Loose hardware, corrosion, mismatched metals, or weak clamping. | Use suitable marine fasteners and backing support where needed. |
| Skipping sealant | Water intrusion around fasteners or into the deck core. | Bed deck hardware with compatible marine sealant and seal old holes correctly. |
| Ignoring underside access | No backing support, hidden damage, or drilling into onboard systems. | Inspect below for wiring, fuel lines, tanks, plumbing, core material, and structure. |
| Over-tightening screws | Cracked gelcoat, crushed core, stripped holes, or failed bedding. | Tighten evenly, avoid forcing poor fit, and use backing support where load requires it. |
| Treating load-bearing hardware as cosmetic | Unsafe handholds, weak mooring points, or fittings pulling loose under load. | Evaluate load path, backing support, deck condition, and professional help. |
When to Use a Professional
Some replacements are straightforward, such as swapping a low-load interior latch with matching holes and sound material underneath. Other jobs need more caution. Professional help is sensible when the hardware carries load, seals a system, mounts through a cored deck, or requires drilling new holes near hidden systems.
Use a qualified marine technician if you find soft core, cracking, delamination, water intrusion, stripped holes, inaccessible backing, unknown wiring, fuel-system components, or structural uncertainty. Hardware related to boarding, mooring, anchoring, steering, or supporting people should not be treated as a casual cosmetic upgrade.
FAQ
What is the biggest mistake when replacing boat hardware?
The biggest mistake is buying by appearance without checking fit, material, fasteners, sealant, backing, and load. A similar-looking part may not match the old holes or suit the same use.
Can I reuse old screws on a boat?
Sometimes, but it is often better to replace them. Old screws may be corroded, weakened, mismatched, or damaged during removal. For load-bearing hardware, use suitable marine fasteners and inspect the holes before reinstalling.
Should I use sealant under deck hardware?
Yes. Deck-mounted hardware usually needs compatible marine sealant to reduce water intrusion around fasteners and bases. Sealant should support proper bedding, not compensate for poor fit, weak backing, or damaged deck material.
How do I know if new hardware will fit old holes?
Measure before buying. Check hole center spacing, base footprint, fastener diameter, height, cutout size, and clearance around nearby parts. Do not assume a similar-looking fitting will match.
When should I replace instead of repair?
Replace hardware when it is cracked, deeply corroded, bent, loose under load, missing parts, or no longer seals properly. If the deck or backing is damaged, repair the structure before installing the replacement.
Related Nove Sea Categories
— Hinges
Related products
-
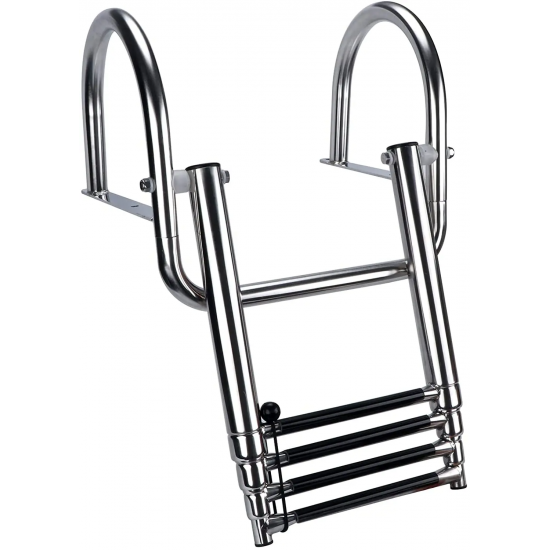
HMI 316 Stainless Steel Telescoping Boat Ladder with Handrail
Old price: $304.00 Price: $273.60 Discount: 10% Save up: -$30.40Step aboard with confidence using this premium-grade telescoping ladder,... -

HMI 4-Step Telescoping Boat Ladder 316 Stainless Steel Inboard Rail Dock Swimming Ladder
Price: $438.00This 4-step telescoping ladder is designed for secure and convenient boarding... -

HMI 4-Step 316 Stainless Steel Telescoping Under Platform Boat Ladder
Price: $267.00This 4-step telescoping ladder is designed for secure and convenient boarding... -

HMI 4-Step 316 Stainless Steel Telescoping Boat Ladder for Marine or Yacht Platform
Price: $229.00This 4-step telescoping ladder is built from high-quality 316 stainless... -

SLT 3-Step Stainless Steel Inflatable Boat Boarding Ladder with Rope and Shackle
Price: $368.00This 3-step boarding ladder is made from thick-walled 304 stainless steel... -

HMI 2 Pieces 16" 316 Stainless Steel Boat Grab Handles
Old price: $98.00 Price: $88.20 Discount: 10% Save up: -$9.80Enhance your deck’s safety and style with this pair of 16" grab handles... -

HMI 2 Pieces 16" 316 Stainless Steel Boat Grab Handles
Price: $99.00This set includes two marine-grade grab handles crafted from durable 316... -

HMI 2 Pieces 316 Stainless Steel Polished Boat Grab Handles
Price: $99.00This set of two grab handles is made from polished 316 stainless steel,... -

HMI 2 Pieces 12" Polished 316 Stainless Steel Boat Grab Handles
Old price: $92.00 Price: $82.80 Discount: 10% Save up: -$9.20Enhance onboard safety and grip comfort with this sleek, heavy-duty,... -

HMI 2 Pieces Polished 316 Stainless Steel 12" Boat Grab Handles
Old price: $108.00 Price: $97.20 Discount: 10% Save up: -$10.80Upgrade your boat’s safety and aesthetics with this premium-grade grab handle... -

HMI Polished 9" 316 Stainless Steel Boat Grab Handle
Price: $42.00This polished 9" (229 mm) boat grab handle is made from high-quality 316... -

SLT 2 Pieces Aluminum 4 Rod Storage Hanger Racks
Price: $178.00Keep your fishing rods secure and organized with this versatile, heavy-duty... -

HMI 4-Tube 316 Stainless Steel Fishing Rod Storage Holder Rack
Price: $97.00This 4-tube fishing rod holder rack is made from 316 stainless steel for... -

HMI 316 Stainless Steel 5-Tube Adjustable Boat Fishing Rocket Launcher Rod Holder
Old price: $442.00 Price: $397.80 Discount: 10% Save up: -$44.20Optimize your boat's fishing setup with this premium 5-tube rocket launcher... -

HMI 316 Stainless Steel Boat Fishing Rod Holder Rack
Old price: $138.00 Price: $124.20 Discount: 10% Save up: -$13.80Secure your gear with this premium fishing rod holder rack, crafted from... -

SLT 2 Pieces 316 Stainless Steel Take-Apart Heavy-Duty Hinge Set
Old price: $174.00 Price: $156.60 Discount: 10% Save up: -$17.40Built for strength and convenience, this set of take-apart hinges is crafted...